
Grab Bars for Bathroom Safety: A Caregiver’s Buying and Installation Guide
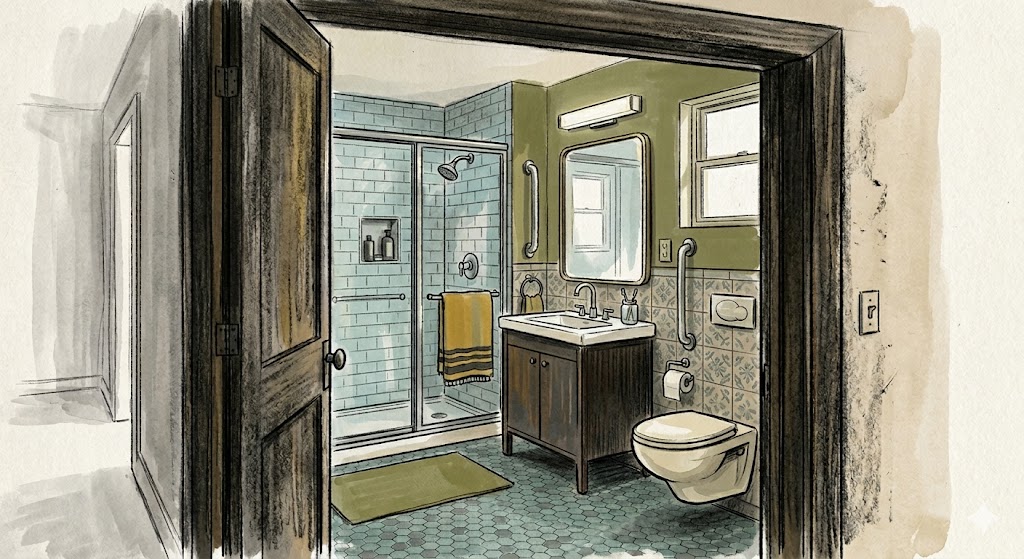
I heard a sickeningly loud thud, then equally sickening silence. After sprinting to the bathroom, I could see the sound was the result of mom catching herself from a fall by slamming her hand against the wall. She was chuckling as I helped her get upright again, but I wasn’t laughing. She had dodged a bullet that could have set her back weeks or months. Or worse.
I thought I had checked the “grab bars for the bathroom” box; the existing grab bars had passed my weight tests, and mom was considerably smaller than me. But the placement that made sense to the contractor years ago did not help an elderly woman losing her footing in real time.
I asked her to go through her typical bathroom routines while I took notes. She wasn’t a fan, but the bathroom had become a place where two seconds was all it took for everything to go wrong. The difference between a close call and a 911 call.
It was clear a bathroom safety upgrade was necessary. This guide covers what I learned after researching bathroom grab bars; what to buy, where to put it, how to install it, and how to make sure the bar itself doesn’t become the hazard.
The problem with the grab bar advice I found
Standard advice I found tells you where bars should go, but not all bathroom bar installs are equal. Places that are self explanatory in theory, but potentially wrong for your specific bathroom and your specific parent. A bar placed in the wrong spot, wrong height, or wrong orientation could torque a wrist, or create a new obstacle where there wasn’t one before.
Why bars fail
Decorative towel bars can look like weight-bearing grab bars, but towels tend to weigh less than people; they are not rated for body weight. If your parent is already using one as a support, replace it ASAP.
Three things to know before you buy:
Weight capacity. I’ve found bars tend to be rated between 250 and 500 lbs, but your mileage may vary. When in doubt, buy the higher-rated bar. The cost difference is small, the peace of mind is large.
Mounting type. Permanent wall-mounted bars only. Some suction cup bars are advertised as strong as traditional mounting, but I don’t want to constantly worry that THIS is the time it fails. Peace of mind is priceless.
Placement over aesthetics. The bar goes where the body needs support, not where it photographs well.
Placement for bathroom grab bars: where to put them and why
Just as I did with my mom, join your (clothed) parent in the bathroom and ask them to go about their routine; getting on and off the toilet, stepping in and out of the shower, reaching for a towel, etc. During the routine, ask them to reach for an imaginary bar. Pay attention to the orientation of their hand, the height, and how wide the bar would need to be. Every bar you install should support those movements without complicating another one.
Tub or shower grab bar installation
This small square footage area is the largest high-risk zone in the house, regardless of age. Wet surfaces, no shoes, confined space. Again, placement must be customized for your layout and parent, but here are some good starting points.
Horizontal bar on the long wall. Install at 33 to 36 inches from the floor (the ADA grab bar standard, and the height that works for most adults moving in and out of the tub). Watch that it doesn’t land directly behind the shower head, where someone reaching for it will step into the spray before they are stable.
Angled bar on the entry wall. A 45-degree bar on the wall at the tub entry helps with the step-over motion. This is the bar my mom needed and didn’t have. If you install one, confirm it’s positioned so the lower end is toward the user as they approach, not angled away. A walk-in shower might dictate a different location than a tub/shower combo.
At the toilet
Sitting down and standing up are where many falls happen for older adults with weak legs or hip problems.
Side wall bar. Install on the dominant-hand wall, 6 inches in front of the toilet centerline, at 33 to 36 inches high. Check that it clears the toilet paper holder, towel ring, or anything else mounted nearby. A bar that requires your parent to reach around something to grab it has failed its purpose. Note the height might need to be adjusted if the toilet has a raised seat.
Flip-down rail. These fold up when not in use, which matters in a small bathroom where a fixed rail could become a leg hazard. Bonus: these tend to make the bathroom feel less clinical when tucked away.
Floor-to-ceiling pole. Another solution if walls are too far away are vertical poles. Available as simple poles, or more versatile models with “branches” that provide a central support for multiple areas and movements in the a tight space.
Outside the shower
A bar just outside the shower entry helps with the step out when your parent is wet, possibly cold, and most likely to rush. Position it so they’re reaching forward or to the side, not twisting back toward the wall.
What to buy
Material
Stainless steel. Rust-resistant, high weight capacity, built to last. Not glamorous. Works.
Chrome. Clean look, fine for most home bathrooms. Slightly less rust-resistant than stainless in very humid showers.
Oil-rubbed bronze or matte black. These poles look like intentional design decisions rather than medical equipment. If your parent is resistant to the idea of grab bars because of aesthetics, a modern finish removes that conversation.
Diameter
ADA guidelines call for 1.25 to 1.5 inches in diameter. This is the grip range that works for most adult hands under stress. Outside this range, the bar is harder to hold when it counts. Before tearing the package open, test drive the diameter by having your parent grip the bar.
Texture
Knurled or textured surfaces grip when hands are wet. Smooth bars can slip. For any bar inside the shower or tub, texture is not optional.
Lengths
Again, subject to your custom needs, but these are a recommended starting point.
- 12 inches – vertical entry bars
- 18 inches – versatile, works at toilet and most shower locations
- 24 to 32 inches – long shower wall, tub entry
- 36 to 42 inches – walk-in shower, extended tub support
The Caregiver Field Guide’s Top Picks

Why it’s here: Due to its angled design, the Moen Brushed Nickel Bathroom Safety 16-Inch Stainless Steel Angled Shower Grab Bar provides more mounting flexibility for most caregiving situations. It’s ADA compliant, offers a 500lb weight rating, comes with hardware, and its brushed nickel provides an upscale, less clinical feel.
Best for: Shower ingress and egress, toilet safety, areas that benefit from multiple grasp angles.

Why it’s here: If your parent’s routine requires multiple bars, this 16-Inch Moen Brushed Nickel Bathroom Safety Stainless Steel Shower Grab Bar matches our angled recommendation for a cohesive look.
Best for: Areas that need a consistent grip angle.
For those parents who don't need as much support, this single rail tucks away to give more space and reduce the clinical vibe.

Why it’s here: ADA compliant, available in matte black or bronze, doesn’t read as medical equipment
Best for: Parents who will use the bar only if it doesn’t look like a bar.

Shower Grab Bar Installation: A Step-by-Step Guide
You’ll want to set aside about a couple hours for the install. This isn’t a task you want to rush. You’ll need a stud finder, a drill, a level, anchors, and patience.
This guide is for general informational purposes and isn’t a substitute for professional installation. Always verify mounting security before relying on any safety device, and consult a licensed contractor if you’re uncertain about wall composition, electrical, or plumbing behind the installation site.
What you’ll need
- Stud finder: I bought a $10 magnetic one and learned framers are unpredictable with their nails. Go for something more advanced, you will use it around the house for years. The Franklin Sensors ProSensor 710 finds studs through tile and plaster reliably.
- Level: No need to get a contractor-grade level. This Craftsman level will do the trick.
- Anchors: If the perfect placement doesn’t line up with a stud, anchors are mandatory. This Toggler set can hold up to 265 lbs through drywall.
- Drill: Any drill works, but if you’re buying new and want to future-proof your handy work, brands like Ryobi and Milwaukee use the same battery across their product line, so think about which “ecosystem” you want if you think you’ll buy more tools in the future. This Ryobi cordless drill kit includes bits and enough torque for tile work.
- Carbide tile bit: Essential if you’re drilling through tile. This 6-piece set covers grab bar installation plus future bathroom projects.
Step 1: Find the studs
Run the stud finder along the wall and mark stud locations your parent identified in pencil. Studs are typically 16 inches apart, but can vary. The goal is to hit at least one stud per mounting flange. Two studs is better. A bar anchored into two studs holds 500 lbs without discussion.
Step 2: Set the height
Start with 33 to 36 inches from the floor for horizontal bars. Then have your parent actually stand in position and put their hand where it would land naturally. That’s where the bar goes, not where the tape measure says. Mark the flange centers and use a level. A bar that’s even slightly off-level looks wrong and, more importantly, feels wrong when someone grabs it off-balance.
Step 3: Drill through tile
Use a carbide or diamond-tipped tile bit. Go slow. Tile cracks under pressure, not under speed. Once through the tile, switch to a standard bit for whatever’s behind it. Before you drill: know what’s in that wall. In most bathrooms it’s cement board or drywall behind tile. Pipes and electrical are not. If you’re not sure, a stud finder with AC wire detection is worth the extra few dollars.
Step 4: Mount the bar
Into studs: use the screws that came with the bar. They’re sized for the flanges. Between studs: toggle bolts only. Standard plastic drywall anchors are not rated for body weight. Skip them entirely. Tighten to snug. Don’t overtorque through tile or you’ll be buying more tile.
Step 5: Test it, then test it again
Before your parent uses the bar, test it yourself. Grip it and put your full body weight on it in multiple directions: sideways, downward, pulling away from the wall. It should not move at all. Any movement could devolve into an accident waiting to happen. Find the source of movement and fix it before anyone depends on the bar, even if that means moving it to a slightly inferior position.
When to call a pro
If drilling through tile makes you nervous, or you can’t locate studs reliably, hire it out. Though pricing varies, a handyman shouldn’t charge more than $100 per bar installed. That’s a reasonable number given what you’re preventing. Some nonprofits and local programs install grab bars for seniors at low or no cost. Start with your local Area Agency on Aging.
The bottom line
Grab bars for your elderly adult are among the cheapest fall-prevention investments you can make. They’re more affordable than hip or leg surgery, quick to install, and one of the few home modifications that pays off the minute it’s installed. Check twice that the bars are rated ABOVE your parent’s weight, as a body in motion puts more stress on the bar. Put them where the body actually reaches in a moment of instability, not where they look tidy. Install them into studs. Test them before anyone depends on them. And walk through every movement sequence before you commit a hole to a wall, because a bar in the wrong spot can cause the exact problem you’re trying to prevent. When you’re ready to look at the full bathroom picture (shower chairs, non-slip mats, toilet risers, lighting), it’s all in our Bathroom Safety for Elderly: Complete Guide.
Frequently Asked Questions
Does Medicare cover grab bars? Generally no. Grab bars are home modifications, not durable medical equipment. Some Medicaid waiver programs and VA benefits do cover them. Your local Area Agency on Aging can tell you what’s available in your state.
How many bathroom grab bars are needed? The only way to answer this question is to observe your parent move about their bathroom. They might have an unpredictable routine, resulting in a bar placement you wouldn’t have considered. And there is such a thing as overdoing it. This is still a bathroom, not a grandkid’s jungle gym.
What’s the difference between a grab bar and a towel bar?
A towel bar is rated to hold a wet towel, maybe a robe if you’re generous. A grab bar is rated to hold a person, often 250 to 500 pounds, anchored into studs specifically because a falling body puts way more stress on a wall than wet terrycloth ever will. If you can’t find a weight rating documented anywhere, assume it’s a towel bar no matter what it looks like.
How do I know if an existing grab bar is actually safe?
Testing real world scenarios. Grip it and pull. Hard. In every direction you can think of: down, sideways, away from the wall. If it flexes, wiggles, or makes a sound you don’t like, it’s not safe, regardless of how long it’s been there or who installed it. My mom’s bar had been in place for years and looked perfectly fine right up until it almost wasn’t. Age and appearance tell you nothing. Only a real weight test.
Can grab bars be installed in a rental?
With your landlord’s permission, yes, though permanent wall-mounted bars work best when you actually own the walls. If that’s not your situation, tension-mounted poles and freestanding rails get you most of the safety benefit without a single hole in the rented drywall. By their nature, they aren’t as strong as something anchored into a stud, but it beats the alternative of nothing.
Can I install a grab bar on my own?
You are better asking yourself than us, but it’s absolutely possible for anyone with mild handyman chops. If you are flying solo, tools are your friend. Painter’s tape can hold the bar in place while you check it’s level, freeing up both hands for the drilling. You can also make a template for the hole pattern with a piece of paper rather than holding the bar against the wall for extended periods. Take your time, just test the final result as mentioned above.
For a broader look at bathroom safety, visit our Bathroom Safety for Elderly: Complete Guide.